

The home page
After installing the app, the home page is where you manage every operation you’ve built. From here you can see what’s running, create new operations, and reorder them within their type.
At a glance
Section titled “At a glance”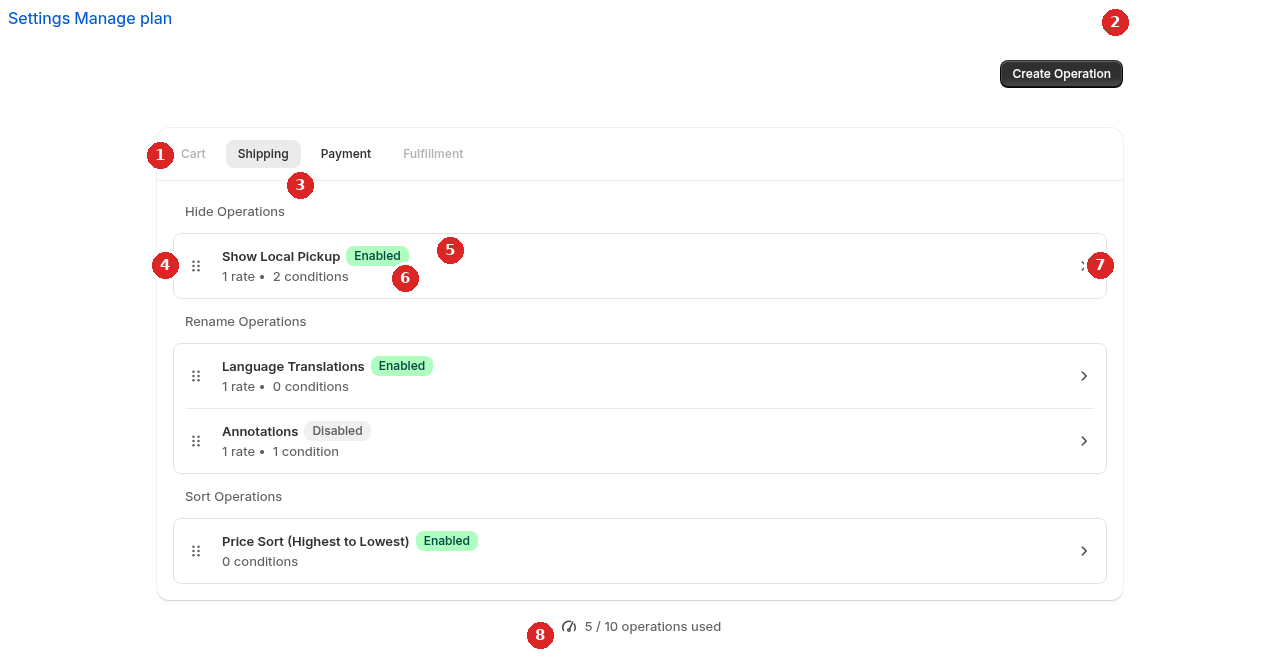
- Surface tabs — switch between the checkout surfaces your operations apply to. Cart and Fulfillment are disabled for now; Shipping and Payment are active. The first surface with operations is selected by default.
- Create Operation — opens a dialog to add a new operation. The button is disabled when you’re at your plan’s operation limit.
- Type headers — operations are grouped by type (Hide, Rename, Sort). Each type has its own section. The type you can build depends on the active surface.
- Drag handle — the six dots on the left of each row. Drag a row up or down to reorder it within its type.
- Operation name and status badge — the name you gave the operation, and a green Enabled or grey Disabled badge. Disable a rule to keep it in the database without it running at checkout.
- Row summary — for hide and rename operations, how many rates or methods the operation targets and how many conditions it has. For sort, just the condition count. Click anywhere on the row to open the operation.
- Chevron — click to open the operation. The full row is clickable, not just the chevron.
- Operations-used gauge — your current count against your plan’s limit, shown as
current / limit operations usedwith a tooltip per operation kind.
Operations are the rules the app runs at checkout. The shape of a rule — conditions, match, action — is covered in Operations overview.
Creating an operation
Section titled “Creating an operation”Click Create Operation to open a two-step dialog.
Step 1: pick the surface
Section titled “Step 1: pick the surface”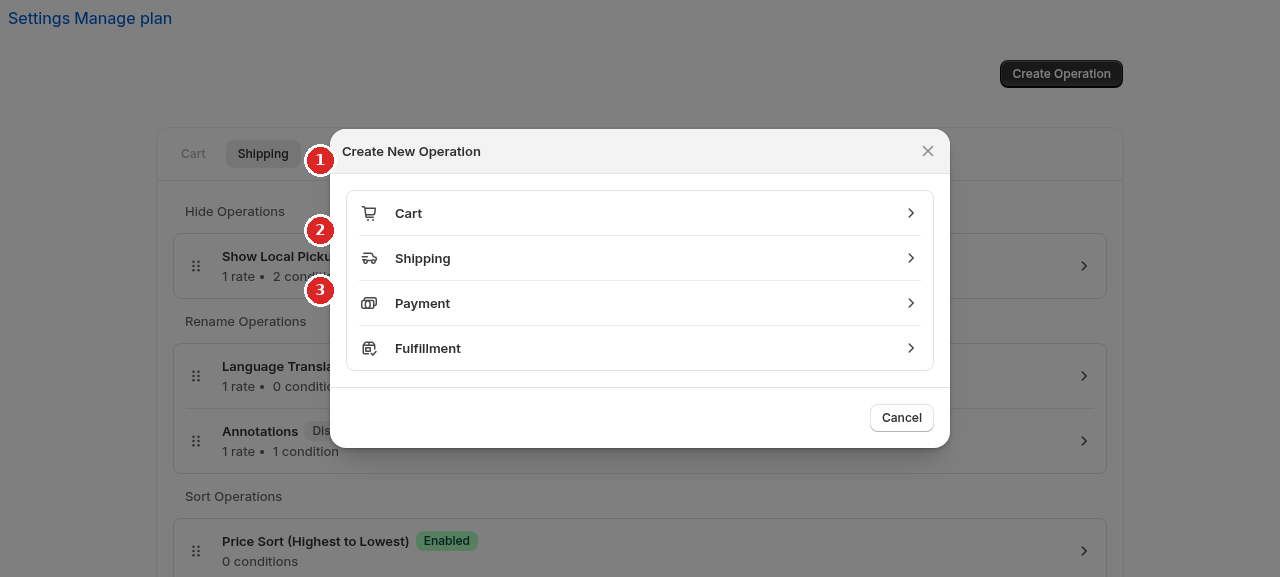
- Dialog heading — “Create New Operation”. This is the first of two steps.
- Disabled surfaces — surfaces you can’t currently add operations to. Cart and Fulfillment are disabled.
- Active surfaces — Shipping and Payment. Click one to continue.
Step 2: pick the operation type
Section titled “Step 2: pick the operation type”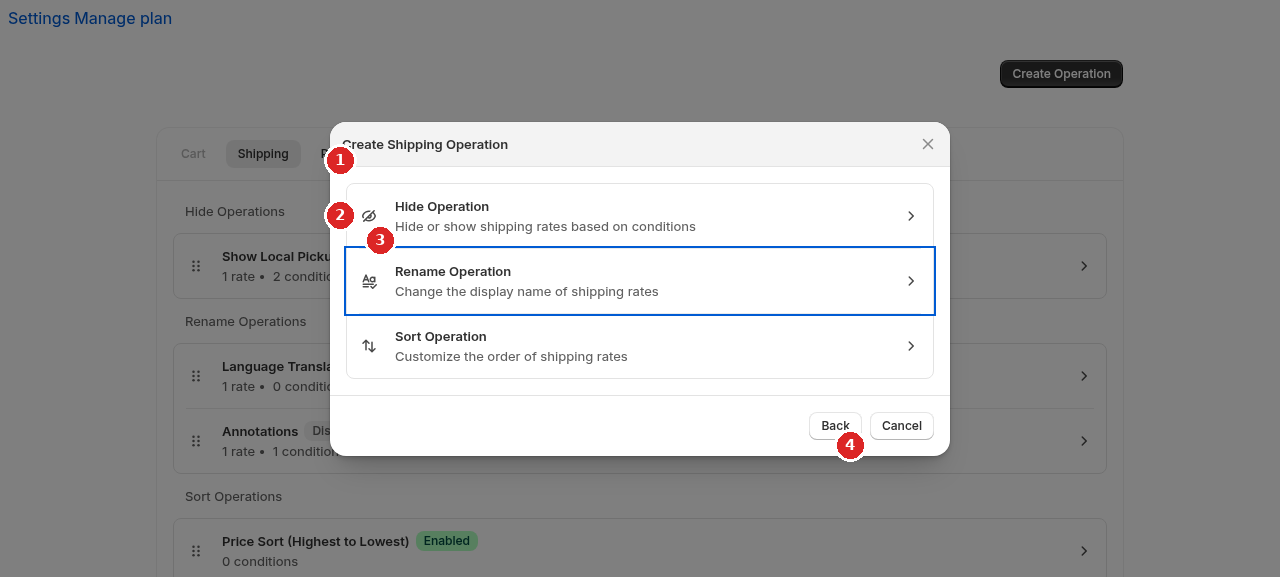
- Updated heading — the dialog now says “Create Shipping Operation” (or “Create Payment Operation”). It reflects the surface you picked in step 1.
- Operation types — the three types available for the chosen surface: Hide, Rename, and Sort. Each opens its own form.
- Per-row description — a one-line summary of what each operation type does.
- Back — return to the surface picker.
Click an operation type and the dialog closes. You land on the new-operation form, which is different for each type. See the Hide shipping rates, Rename shipping rates, and Sort shipping rates guides for the per-type walkthroughs.
Reordering operations
Section titled “Reordering operations”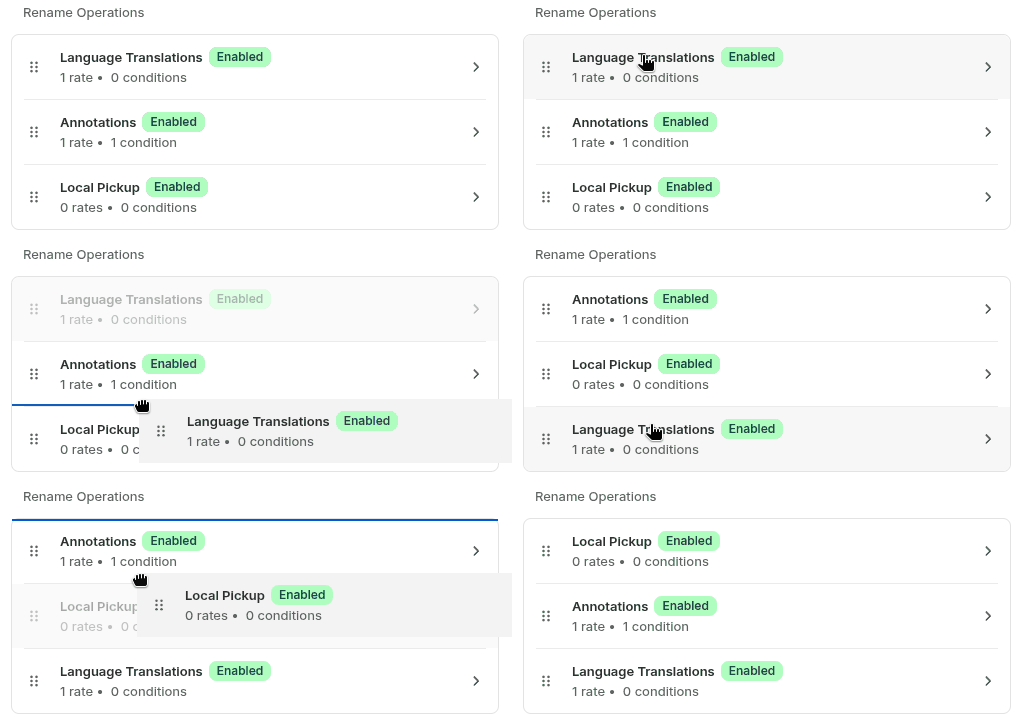
Each row has a drag handle — six dots on the left side. Hover over the handle and the cursor changes to a grab hand. Click and drag the row to a new position. A blue line shows where the row will land when you drop it.
You can also click anywhere on the row (not just the handle) to grab and drag it.
Reordering only affects operations of the same type on the same surface — moving a hide operation doesn’t change the order of rename or sort operations, and moving a shipping hide doesn’t change payment hide.
See Order of operations for how execution order works across types and within a type.
Limits
Section titled “Limits”When you reach your plan’s operation limit, the Create Operation button is disabled and a banner appears at the top of the list:
You have reached your plan limit of N operations. Upgrade your plan to create more.
The banner has a Manage Plan button that takes you to the plan picker. See Operations limit for the full rules — what counts, what doesn’t, and how to free up a slot.